About Us, and the Blog

an expat guide to cooking abroad


We are two expats currently living in Thailand who are big foodies and love to cook. While cooking familiar and new foods can be a little difficult overseas, especially where we live (not in a major city), there are also great, fresh ingredients available at markets that can turn into some truly delicious dishes.

We're challenging ourselves to be creative with what we have, cook more from scratch, and to appreciate the ingredients available to us. We also look forward to sharing our adventures with you, and hope that you enjoy reading and trying some of our recipes - whether you also live in a challenging cooking environment or have the ingredients at your fingertips.

03 July 2013

Cheese: The Biggest Accomplishment of my Life


One of the food items I miss most is cheese. I mean, I’m from Vermont. Cheese is a very important part of my life. I can eat it for breakfast, lunch and dinner. Even dessert. Yummm apple pie and cheddar cheese.
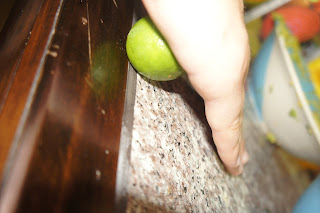
Squeezing limes for the acid.
Anyway. Yes, there technically is cheese in Chiang Mai. Technically there is almost everything in Chiang Mai. But it’s a little out of my price range, and not that great quality either that I can tell. So, when a friend casually mentioned that she knew how to make cheese, a kind that doesn’t require any fancy inputs, only milk, an acid, and salt, I was all over it.


One Sunday evening, in between rounds of a fairly complicated but very fun board game, she taught me how to make cheese. She calls it paneer, I call it a generic ‘farmers’ cheese,’ and it can be anywhere from whipped-cream-cheese texture to a paneer or hard feta. You can also add herbs and other flavors to mix it up.

Making cheese is fun!
The next week, Jon and I taught some of our Chiang Mai friends how to make the cheese, and split a bunch of it. This week, a friend and I went super-fancy and got goats’ milk at a local health food store (told you, Chiang Mai has everything). The resulting cheese was a tart, creamy goat cheese, into which I plan to mix some of the half-kilo of dill that was the smallest size the vendor at the market would sell me. Seriously, it’s a freakin’ tree of dill. But that’s beside the point.

What’s the point? You can make cheese in a rice cooker, using milk you buy at the grocery store. It’s really easy. It’s no aged cheddar, or tangy Gruyere, but it’ll do. Especially when your main source of dairy is an overdose of condensed milk in your iced tea.

I’ll call it bootleg cheese.

Bootleg Cheese
Equipment: a rice cooker or stove and pot; a thin cloth (can be cheesecloth, we used a cheap-o handkerchief and it’s fine); colander or something else with holes (steamer tray from a rice cooker works well).

Ingredients
-Milk (however much you want. A liter will make around 2 cups of cheese, depending on how hard you want it. The harder the cheese, the less cheese your milk will make.
-An acid – vinegar or lime juice. We used lime juice, couldn’t really taste it in the outcome, don’t worry. A liter of milk will use 1-2 Tablespoons, depending on how strong the acid is (less vinegar, more lime juice).
-Salt – around a teaspoon.

Step 1: Pour milk into the rice cooker/pot and turn on medium-high heat (or just ‘on’ in the case of a rice cooker). Sprinkle in about a teaspoon of salt, depending on how much milk you have and how salty you want your cheese. You can always add more later.


Step 2: Heat up the milk to a slow boil, to where it starts to get foamy and bubbly, and a bit of a skin on top.

Step 3: Turn off the heat and immediately add your acid, slowly, until the milk separates into curds and whey. (At this point you may want to make a Little Bo Peep joke). You want to make sure it fully separates, so once it looks separated, add a little more acid. You will be able to see white clumps floating in a yellowish-clear liquid.

Step 4: Put the cloth into the straining instrument (colander, steaming tray, etc), and rest the strainer over a bowl or in the sink. (If you catch the whey in a bowl, you can use it to bake, cook pasta, etc to add a bit of creaminess to a recipe that calls for water). Then pour the ‘liquid formerly called milk’ over the cloth.

Step 5: Let the liquid sit, with the whey draining out of the cheese. Once enough liquid drains out and it looks like runny cottage cheese, you can gather up the ends of the cloth and squeeze out more whey. If you want the cheese to be hard, tie the cloth up around the ball of curds and hang it overnight over a bowl or the sink. If not, the cheese is finished as soon as it’s the consistency you want.

Keep in mind that this is a bit of an experimentation process. Measurements can’t be exact because different milks behave differently, and the acids may be different concentrations. The first time we tried this at home, it was a disaster. But also, if you mess up the separation process and it doesn’t seem to be draining, just start over – combine everything again, reheat the milk, add more acid, etc. It may end up more creamy, but it’ll be fine.


16 April 2013

Chicken Noodle Soup

This is my first experiment in rice cooker cookery during which I actually left the apartment during the cooking process. This is supposed to be one of the benefits of using a rice cooker, and it is still pretty hands-off, but usually I’m afraid to leave it cooking while I’m gone, in case it dries out.

But since this time I was making soup, I thought it might work. So I threw all the ingredients into the rice cooker, with plenty of water, and went for a run in the campus of the university that’s right up the street from our apartment. When I got back, I had delicious chicken noodle soup! Perfect.

For this recipe I used leftover barbeque chicken from this delicious Texas-style barbeque place in town, but you can also use any grilled chicken that is – at least in Thailand – available on the side of the street all over the city, especially at dinner time.

I also used egg noodles, because I like the taste and texture, but you can use any kind of noodles. The flour from the fresh egg noodles did thicken the soup, which I liked, but be aware that it will be a little thicker than your traditional chicken noodle soup if you use fresh egg noodles.

Chicken Noodle Soup


1 -2 C shredded chicken (pre-cooked)
1 large potato, cubed
1 large carrot, sliced
1 yellow onion, chopped
2 handfuls of egg noodles (or other noodles)
1/2 Tbsp dried oregano
2 cubes of bouillon (chicken or vegetables0
salt and pepper to taste
depending on whether the chicken is already seasoned, you may want to add more seasoning, such as ginger, chilies, or cumin.
Bread to serve with (optional).

Add all ingredients to the rice cooker and add enough water to reach about two inches above the ingredients. Start the rice cooker, and leave for about 45 minutes. Enjoy.


A Little Feta Goes a Long Way


Around here, cheese can be rare. And if not rare, expensive – so those of us volunteers/people on very small salaries can rarely buy it. When you do feel like splurging, then, it’s important to really get a lot out of your cheese.

A few weeks ago, I found a block of what was labeled “Buffalo feta” at an imported foods store. According to the label, it was part of the Royal Project, an income-generation and/or opium-substitution program sponsored by Thailand’s Royal Family. Since I’m a pretty big proponent of introducing more dairy to Thailand, for selfish reasons, I decided to support this initiative by buying the cheese.

It turned out to be pretty good, though somewhere between feta and mozzarella. Not quite as strong as the feta I’m used to, but similar, with a hint of fresh mozzarella. And from the name and picture on the label, it appears to be made from water buffalo milk, which is pretty cool.

In the interest of making your cheese go a long way, I have two feta recipes for you.

1) Feta, Watermelon and Mint Salad

Pretty self-explanatory, and a great, refreshing snack for hot season. Just chop up some mint, cut some watermelon slices, and sprinkle some feta on top.

No cooking equipment required.

2) Feta and Roasted Vegetable Pasta

serves 2
equipment: rice cooker (and optional oven)

1 zucchini
2 small purple eggplants (or one big one)
1 package of pasta
water
1/4 cup of crumbled feta or other salty cheese
1 Tbsp dried oregano (optional)
olive oil to taste
salt and pepper to taste


1. Cook the pasta in your rice cooker, using enough water to cover about an inch over the pasta. Keep an eye on it, since the rice cooker will not turn off automatically when the pasta is done, like it does for rice.

2. For this recipe, I did use my oven to roast slices of the zucchini and eggplant in some olive oil. But if you don’t have an oven, you should be able to sauté the vegetables in some oil in your rice cooker. I’ve used this technique for other vegetables. Just turn it on, add some oil, and close the lid and turn it on to heat the oil. Once you can hear the oil sizzling, open the lid and add the chopped zucchini and eggplant. Keep the lid open – the weight of the vegetables will keep the cooker on – and stir occasionally until done.

3. Add the vegetables to the pasta, add the oregano and some salt and pepper, and drizzle some olive oil over it. Add the crumbled cheese and toss to mix. Enjoy.

This also works well cold as leftovers, like a pasta salad.

09 March 2013

Pumpkin and Lentil Curry

Jon's not here this month, which means I have to cook for myself. And do the dishes. Which is a serious pain in our apartment because we don't have a kitchen sink. Instead, we wash dishes w/ the faucet and drain on our balcony, with a bucket.

All of this means I am too lazy to cook and clean every night. So I cook a few times a week, and eat leftovers every other night. I've found that curries work great for that, and are simple and easy to make with the rice cooker. Basically just throw everything in the rice cooker and go.

I've tried a few recipes, but I like this one the best - Moroccan Pumpkin and Lentils, adapted from this recipe in the Vegetarian Times. It's delicious and filling, and that recipe, along w/ rice, makes enough for three meals for one person. Plus, pumpkin is easy to get around here, and so are lentils.

(Oops, sorry, forgot to take photos of the finished product!) 

Pumpkin and Lentil Curry
Three to four servings
1 medium yellow onion
2 small red chilli peppers
2 Tbsp cooking oil
2 tsp curry powder
1 tsp cumin
1 tsp black pepper
1 cup red lentils
2 lbs of pumpkin (about 3 cups), cubed
2 medium potatoes, cubed
2 C water
1 small can tomato puree
4 tomatoes, chopped

1. Cook three or four servings of rice in the rice cooker. Meanwhile, chop one onion, two small red chilli peppers.

2. When the rice is finished, clean out the rice cooker, then add oil, onion and peppers to the rice cooker. Turn the cooker on, keeping the lid open, and saute the onion and pepper until the onion is translucent.  

rice cooker tip: If your rice cooker won't turn on to saute the onion, try putting something  heavy, like a pan, over the bowl. The weight should allow the cooker to turn on.

3. Add all the rest of the ingredients to the rice cooker and close the lid. In about 20 minutes, check the curry to see if it is done. The pumpkin should be soft, and the lentils should be soft and/or disintegrated into the curry. Keep cooking until as thick as desired.


24 February 2013

Baked Ziti, and Too Much Cooking Wine

When we moved in a few weeks ago, Jon and I bought some basic kitchen ingredients to stock up - vinegar, soy sauce, the usual.  Somehow in our frenzy of moving in, buying kitchen stuff, and buying apartment necessities like sheets and trash bags, we convinced ourselves that a 5L glass jug of wine was a 'basic kitchen ingredient.'

The idea, of course, was that we would cook with the wine. Wine in Thailand is not very good and comparatively very expensive, so it's not like we could just buy a bottle to cook with and drink at the same time - no way its worth it to pour any wine in what you're cooking when you've splurged on a bottle to drink.

So the theory made sense, especially since we figured we would be cooking with wine all the time in the rice cooker ... pasta, stews, etc.  Three weeks later, we've only used it about three times, so maybe it wasn't the best investment.  We tried to drink some the first night - you get desperate for wine in Thailand and even stoop to drinking the cooking wine - but it was not worth it.

So, then, a question for the readers - any ideas of what, besides pasta and the rare pot roast - red wine is good in?

Nice, steaming pot of pasta
But whether or not you have wine, you can make the pasta I made in the rice cooker. It turned out a lot like baked ziti. No melty, crispy cheese on top - cheese is another rare/expensive commodity here - but we did have a little Parmesan to throw on the finished product.

Baked Ziti (in a rice cooker)
makes 3-4 servings

8 oz uncooked pasta (any shape, preferably thicker so it will hold up to the baking - we used ziti)
2 C liquid (we used 1C water and 1C wine, you could use any combination of water, wine, broth, etc)
1 small can tomato paste
6-8 plum tomatoes
2 Tbsp dried oregano
3 cloves garlic, minced
1/2 an onion, diced
1 tsp black pepper
1/2 tsp cinnamon (trust me)
sausage or ground meat (optional)
salt to taste
shredded Parmesan cheese (optional)

1. Throw everything in the rice cooker.

2. Turn the rice cooker on. Depending on the rice cooker, it will turn off when the pasta is done, or you might have to check it once in awhile. Our (very no-frills) rice cooker, which just has an on/off switch, timed it perfectly.
 3. Sprinkle cheese on top and serve.

Finished product


10 February 2013

Back with a Vengeance ... and a Rice Cooker

Welcome to the Floating Coconut version 2.0 ... or maybe really it's just the original Floating Coconut getting back to its roots. Either way. Jon and I started this blog to chronicle the challenges of cooking abroad, without all your familiar ingredients and big, Western kitchens. We started this in the hopes that it would be useful to fellow expats in Thailand and all over Asia and the world (though some ingredients are region-specific) cooking in cramped kitchen.

We started out with just an electric induction burner - it came with the apartment - but already that put our kitchen ahead of most people we knew in town. Then we bought a blender, and an oven, and found out that you could find most ingredients you might want or need in town, and started buying them.  Soon, it became any old cooking blog, theme-less and, to be honest, not very interesting to write on.

But NOW. Now we have moved to a new city - much bigger, with way more food variety, but our kitchen has down-sized and we have a renewed determination to bring you recipes and food stories in the following categories - 1) cooking in a rice cooker; and 2) seasonal ingredients.  That's right, we have embarked on an epic journey and ditched our burner (ok, we moved and didn't get to bring it) for a rice cooker. We still have an oven, and a blender, but plan to focus here on recipes you can make with just a rice cooker.

Our new kitchen ... aka a desk with food on it and a rice cooker in the corner.


I've also started getting used to the whole seasonal-eating thing.  Since we buy almost all our produce from the markets, I've really enjoying seeing what produce is in season, and finding new ways to use it.  So we'll put in those recipes, too.  For instance, here it's strawberry season (but they're still a little expensive...) and, more importantly, its the beginning of MANGO SEASON! Which means the long-awaited mango with sticky rice, but also that I get to do tons of experimenting with mangos.

So, for the first recipe of Floating Coconut 2.0, I bring you - Mango Oatmeal in a Rice Cooker! 

It's super simple, and a great way to use fresh fruit, and to make a relatively hands-off healthy, filling breakfast.  One of the things I like best about rice cooker cooking is you just prep everything, throw it in, and press the button. Then you get to go about your normal routine (in my case, making coffee) and, in about 10 minutes, your breakfast is ready! Voila, hot coffee and delicious oatmeal.

Ingredients 
Servings: 2 
oil to grease the rice cooker
1/2 C rolled oats (you can use steel-cut oats but the proportions of water are different)
1 C water
1 medium yellow mango (or 1/2 C of any fruit), chopped into small cubes
1/2 Tbsp sugar (optional)
pinch cinnamon (optional)

1. Rub a little cooking oil on the bottom and sides of the rice cooker to prevent burning of the bottom layer.

2. Put all the ingredients in a rice cooker, and start the cooker. It may look a bit watery when the cycle is finished, but if you mix it all up it should be the right texture, since the oatmeal on the bottom will be drier.   

3. Add sugar and cinnamon to taste, if desired. I recommend the cinnamon, even though cinnamon an mango may sound strange. It adds a good cozy flavor. 

If you really want to go all-out, chop up another mango, a frozen banana (or fresh, but also add a few ice cubes), and a small pack of yogurt and blend for a delicious smoothie to complement the oatmeal... or, like I did, for a snack later.

12 December 2012

Tis the season

Even here in Thailand, where the residents are predominately Buddhist, Christmas is in the air. While we won't get a white one, or even a cold one, we are getting into the spirit by stringing some lights across our walls, drinking hot cocoa, watching Christmas movies, and briefly (just once really) listening to carolers.

But this is a food blog, so where is the food???? Well, this is where we need some help. We are having a cookie swap and we need some ideas. 

Next week I will share what ever recipe I us and the degree of its success. Please share your ideas, thoughts and links!!!!

** So, just spent 2 hours filtering through 4,550ish photos and not one of them were Christmas cookies... this needs to be corrected!